A recipe that is not for the faint of heart and a result that will definitely impress your tea-loving friends.
1 3/4 to 2 pounds oranges (4 to 6 medium, 6-8 small)
2 lemons
6 cups water
3 pounds, 12 ounces to 4 pounds white sugar
10 (8-ounce) canning jars
- Wash the fruit very thoroughly (you’ll be eating the skin!).
- First, we’ll deal with the oranges. Cut away any imperfections on the exterior of each orange, then slice into 1/8″ rings. Handling each ring individually, remove any seeds and slice further into quarters. Be picky; don’t include extra tough pithy pieces. Another good trick is to work over a bowl or a rounded dish to catch any juice that may accumulate as you’re picking through orange rings.
- Throw all the orange quarters into a large pot- choose one that’s plenty big otherwise you’ll have a sticky overflow when you boil the fruit with the sugar later on. Empty any juice from your work station into the pot.
- Next, the lemons. Zest lemons thoroughly over the large pot. Then, place them on your work surface and cut away the outer pith from the inner core of juicy fruit. Try to do this in a single cut, so that you’re left with one piece of white “skin” from each. Juice the centers (removing any seeds) and add to the pot along with both white rinds (which will be removed later).
- Add water to the fruit and bring to a boil over high heat. Once boiling, reduce to a rapid simmer and cook until oranges are soft (~40 minutes). Stir frequently.
- Remove from heat and stir in sugar. The amount you’ll need will differ based on how much fruit you use, how much juice is in each orange and whether you like super sour marmalade. I prefer my spreads a bit sweeter, so I used closer to 4 pounds of sugar. Handy conversion: 1 pound of sugar is ~2 cups.
- Place the mixture, covered, in a cool place for at least ~12 hours or overnight. This step is key and will ensure that your marmalade sets.
- After giving your fruit time to rest, remove the two lemon rinds, return the pot to the stove and bring to a slow simmer, stirring ever so often. Cook like this for ~1 hr. Now is when you should sample the marmalade to make sure you don’t need to add more sugar.
- Meanwhile, fill another large pot with water and bring to a boil. Wear an oven mitt and use a pair of tongs to carefully drop jars and rings into the water. Be sure the water covers the jars by at least an inch. After they have boiled for 10 minutes, turn off the heat and add the lids. Then, remove from heat and let sit.
- Once your fruit has simmered, turn up the heat and bring to a boil. I used a lid for this stage, but didn’t fully cover the pot to prevent a sudden overflow. Stick a plate in the freezer- you will need it to check doneness of the marmalade.
- Using a candy thermometer, check the temperature every 4-5 minutes. You are looking for the mixture to darken and reach the magical range of 222-223ºF. As you near this temperature, start doing the “plate test”. Remove the plate from the freezer and drop a small blob of marmalade on it. Let sit on the counter for 30 seconds then tilt. If the mixture runs quickly, it’s not ready; the goal is a soft gel-like texture. Clean the plate until cool water and return to the freezer.
- While you wait, remove jars, lids and rings from the water and let dry on a clean towel.
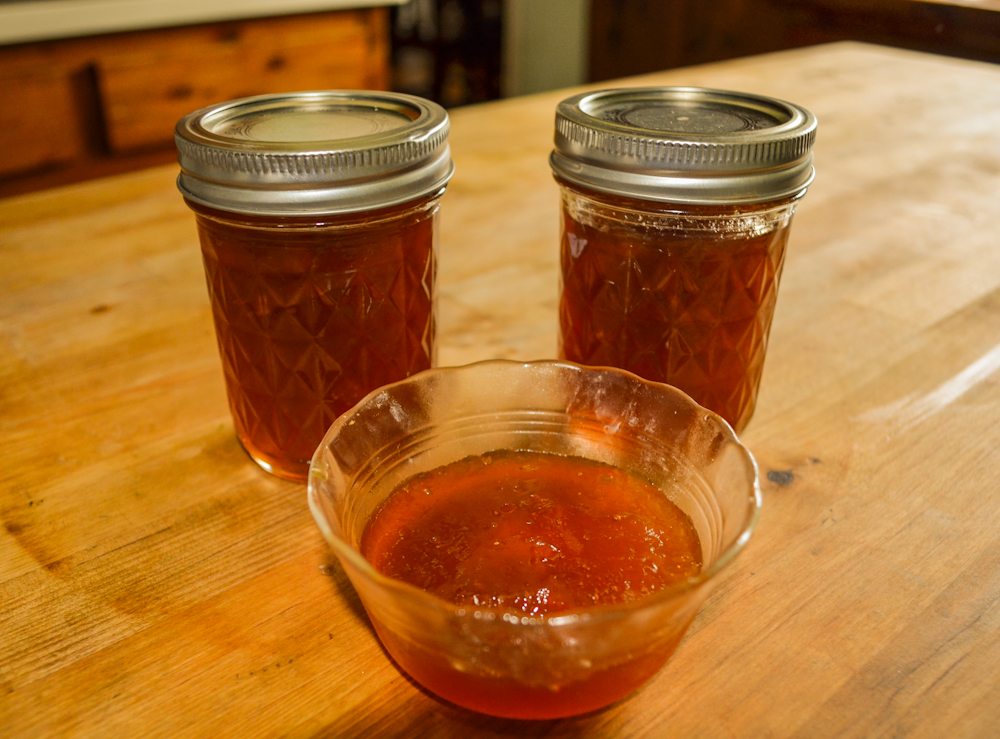
- When you finally do reach that magic point of doneness (be patient!), ladle the marmalade to just below the threads of each jar. You may find that you make a little bit more or a little bit less than 10 full jars. If you don’t have enough left to fill an entire jar you can pour the remainder into a glass dish and cover with saran wrap for same-day tasting.
- Next, we need to seal these bad boys. Again fill a pot with water and place a circular cooling rack on the bottom of the pot. This is to keep jars from touching the hot metal directly. Bring to a boil and then return filled jars (around 5 at a time) to the pot. Be sure they don’t touch the bottom, the sides or each other. You could also use a metal mesh basket or even a folded kitchen towel or cooling pad. Jars must be covered by at least an inch of water.
- After 10 minutes remove the first batch from the water and repeat with the second batch.
- Yay! We’re done! Place jars in a cool, dry place and allow to sit at room temperature for 1 day before opening. You should feel that they are sealed by pushing down on the center of the lids. Keep in the refrigerator once opened.